A slice of cake anyone??
I know the cake slice box has been doing the rounds on different Blogs now for a while, but I have been wanting to have a go a making this and since I was a Chef and I do still enjoy making cakes, I thought this would be a fun way to include cooking and paper crafting together!! Better late than Never!!
Anyway last week I was using my Cricut machine, and while I was looking for a shape on one of the cartridges which I have owned for about 4 years (Tags, Bags, Boxes and More) I came across the template for a Cake Box (gee, maybe in future I should actually look at things I already have!)
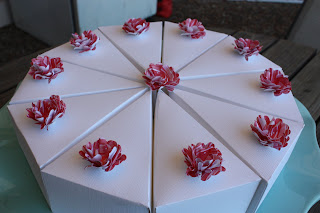
Now, I have one of the original Cricut machines, which cuts 6x12 inches, so this will only cut the cake box at a fairly small size (I think it is up to 5 1/2 inches) but at work we have the Cricut Expressions machine which will cut to 12 x 12 inches. I placed a sheet of 12x12 Textured White onto the mat and keyed in the Cake Box shape and asked it to Fit to Page, it ended up cutting it out at 9 inches. Although it was quite large, I thought it was a good size.
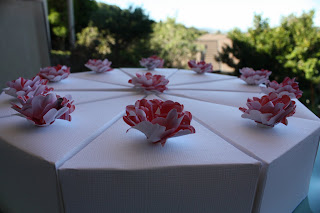
In no time at all, I had 12 Cake Box templates all cut and ready to be scored. WOW. This is so much faster and easier than having to cut them all out by hand!! I used 12 sheets of white cardstock to get a Full Cake, and I think it took me about 30 minutes to put all 12 boxes together. In the end my cake stand only held 10 slices, as they were quite big slices. How easy would that be if you were wanting to use them as wedding boxes. The Cricut also cuts little slits in it, so if you were to add ribbon, it is easy to thread through.
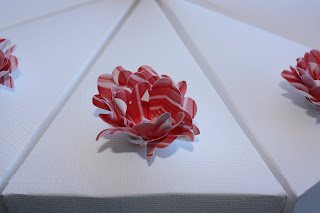
I cannot for the life of me remember who’s blog or where I saw the Tutorial on how to make these cute flowers which I have placed on each slice. (so if anyone knows, please email me, so I can give them the credit they deserve).They are made using the scalloped circle punch, tweezers and glue.
I started making the flowers out of some old patterned paper (non Stampin' Up!)I had at home, but unfortunately it wasn’t double sided, next time I think I would use double sided paper as it would look better (if you look closely, you can see the yucky writing from the back of the patterned paper on the bottom and sides of some of the flowers). Hopfully the photos are OK and that you can see the detail.
I’m happy with the end product.. it looks yummy enough to eat!
Thanks Jules


